Installing electrical wiring in a new home requires careful planning and execution to ensure safety and functionality. Start by understanding rough electricity, which involves laying out wires and outlet boxes while walls are still exposed. Planning your electrical layout is significant; adhere to NEC guidelines for outlet placement. Gather essential materials such as NM cable, AFCI breakers, and the right tools like wire strippers and a voltage tester. When installing boxes, ensure they’re level at proper heights. Running the wire correctly is crucial—secure it with staples close to each box. Finally, double-check all connections before calling for an inspection to guarantee compliance with local codes before finishing up your project.
1. Understanding Rough Electricity
Rough electricity installation is the foundational step in any new home construction wiring in Winston-Salem. It involves laying out the electrical wiring, setting up outlet boxes, and preparing connections for light fixtures while the walls are still open. This phase is crucial for ensuring compliance with local safety codes and regulations, which helps prevent future hazards. Familiarizing yourself with these codes is essential before you start.
Different types of electrical circuits exist, including general circuits for regular outlets, dedicated circuits for high-power appliances, and lighting circuits specifically for fixtures. Understanding how to calculate load requirements for your circuits is vital to avoid overloads that could lead to tripped breakers or worse, electrical fires.
2. Planning Your Electrical Layout
Begin your planning with a detailed floor plan to visualize all your electrical needs. Use graph paper or design software to create accurate layouts that make it easy to see where everything will go. Pay special attention to high-use areas like kitchens and living rooms, where outlets are essential. It’s crucial to position outlets away from water sources for safety. Also, think ahead by including extra outlets in less obvious places, which can save you trouble in the future.
When planning lighting, consider the types you need: ambient for general illumination, task for specific activities, and accent to highlight features. Including dimmer switches can provide flexibility, allowing you to adjust lighting levels based on your needs. Ensure a logical flow between your switches and light fixtures for convenience; it should feel natural to turn on and off lights from where you’ll be using them.
3. Materials and Tools Required
Gathering all necessary materials before starting the installation is crucial for a smooth process. Selecting the right gauge wire is essential; for example, use 14-gauge wire for 15-amp circuits and 12-gauge for 20-amp circuits. Quality electrical boxes that fit the number of wires and devices will help maintain organization and safety. Keep plenty of cable staples on hand to properly secure your wiring. Wire nuts should match the size and number of wires being connected to ensure solid connections. Investing in a reliable voltage tester is vital for safety during the work. A utility knife will be handy for cutting both wire and sheathing.
4. Installing Electrical Boxes
Installing electrical boxes is a crucial step in the wiring process. Start by following the manufacturer’s instructions for the specific boxes you are using. Using a stud finder, locate the studs in your walls to ensure secure mounting of the boxes. Typically, outlet boxes should be installed at a height of 12 to 18 inches from the floor, while switch boxes are usually set at 48 inches. Before securing the boxes, check that they are flush with the wall surface; this ensures a neat finish and prevents any issues with outlet or switch covers. A level is your best friend here—make sure all boxes are properly aligned for a professional look.
When securing the boxes, use screws or nails, but take care not to over-tighten them as this can damage the box. If you’re retrofitting into existing walls, consider using old-work boxes, which are designed for this purpose and can provide a sturdy installation. It’s also a good practice to label each box for its intended purpose; this will simplify the wiring process later on. For outdoor outlets, always install weatherproof boxes to protect against the elements. Lastly, avoid placing boxes too close to corners or edges of walls, as this can create complications during the installation and might interfere with the functionality of your electrical system.
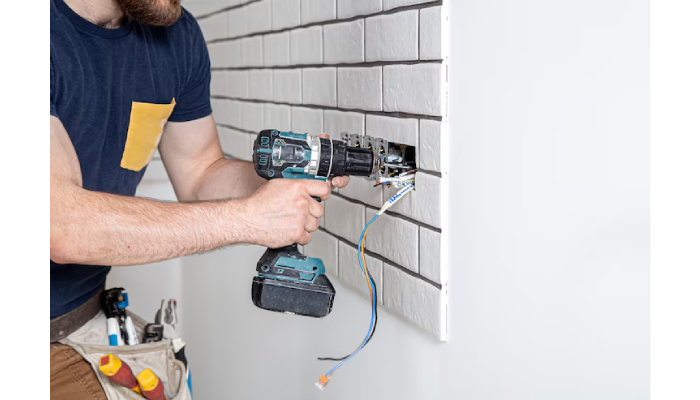
5. Running Electrical Wire
Running electrical wire is a critical part of your home’s wiring process. Start by planning the wire route carefully. The goal is to minimize the distance and avoid any obstructions. Use a drill to create clean holes in the studs, making sure they are centered to maintain structural integrity. As you feed the wire through these holes, leave enough slack at each box to allow for easy connections later on.
To keep the wire secure and prevent movement, use cable staples within six inches of each box. This step is important to avoid any damage during construction or renovation. Be cautious about running wire near plumbing or heating ducts, as this could lead to interference or overheating. Keeping the wire runs as straight as possible not only looks professional but also helps in maintaining the integrity of the wire insulation.
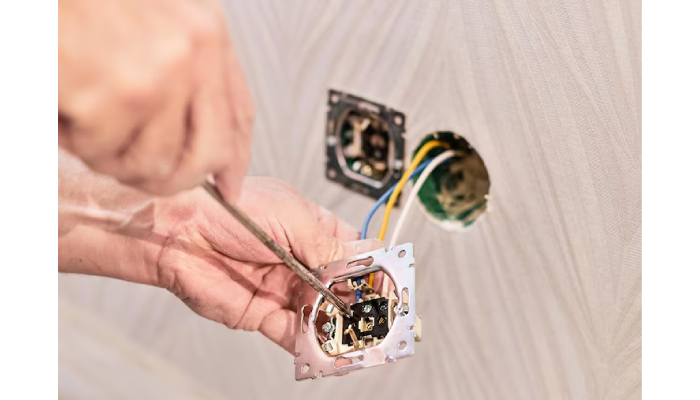
6. Connecting Outlets in Series
To connect outlets in series, start by stripping about 6-8 inches of wire sheathing at each electrical box. This gives you enough access to work with the wires comfortably. Use wire nuts to securely connect the ground wires, ensuring they are tight. It’s crucial to connect the black (hot) wires and the white (neutral) wires as well, following the standard color coding: green or bare for ground, black for hot, and white for neutral.
Before you finalize any connections, test them with a voltage tester to confirm that they are correctly wired and that there’s no live current. Consistency in wire lengths is important to reduce the risk of shorts, so keep them uniform. Labeling the outlets can be helpful for easy identification during troubleshooting down the line.
7. Setting Up Lighting Circuits
Setting up lighting circuits is a crucial step in electrical installation that requires careful planning and execution. Start by mapping out your circuit layout, ensuring efficient wiring from the switch to each light fixture. For lighting circuits that handle under 15 amps, use 14-gauge wire; if you’re working with 20 amps, switch to 12-gauge wire. It’s essential to connect the switch to the light fixture using the right lengths of wire, making sure the switch is easily accessible, preferably near the room’s entrance.
When selecting light fixtures, check their compatibility with the bulbs and dimmers you intend to use. This step can save you from future headaches and ensure that your lighting is both functional and aesthetically pleasing. To achieve balanced lighting, place fixtures evenly throughout the space, taking care to avoid dark corners.
8. Connecting to the Main Panel
Before making any connections to the main panel, it’s crucial to turn off the power to ensure your safety. Begin by installing the appropriate breakers—AFCI or GFCI—as required by your local codes. When connecting the circuit wires to the breaker, match the colors correctly: black wires to the hot terminals, white wires to the neutral terminals, and green or bare wires to the ground. Make sure these connections are tight and secure to prevent any risk of arcing, which can lead to fire hazards.
Label each circuit clearly within the panel for easy identification and future reference. If the breaker specifications call for it, use a torque wrench to ensure the connections are tightened to the manufacturer’s recommended settings. It’s also wise to keep the panel door accessible for any troubleshooting that may arise later.
9. Final Steps
Before sealing up the walls, it’s crucial to double-check all connections and wiring paths. This ensures everything is in order and compliant with safety standards. Use electrical tape to secure wire nuts, preventing any accidental disconnections that could lead to future issues. Make sure all boxes and fixtures are properly secured and level; this not only looks better but also functions better. Once you restore power to the system, conduct a thorough test of all outlets and switches. Pay close attention for any unusual sounds or smells, as these could indicate potential problems.
Documentation is key during this phase. Keep records of your work for future reference or inspections, and consider taking pictures of the electrical layout. This can be incredibly useful down the line. Also, ensure that you clean up any debris from the installation process. Be prepared for any follow-up inspections by local authorities, and document any changes made during installation. This thoroughness not only promotes safety but also enhances the overall quality of your electrical system.