Customizing miniature LED lights for decorations starts by choosing the right types, like adhesive-backed strips, individual bulbs, or flexible neon LEDs. You’ll need materials such as LED strips or bulbs, a matching power source, connectors, and a controller to adjust colors and patterns. The process generally involves measuring and cutting strips carefully at marked points, sticking them to your chosen surface, connecting components securely, then testing before final setup. Using apps or remotes makes it easy to change colors by mixing red, green, and blue intensities for unique shades. For more advanced effects, programmable controllers help create dynamic lighting that enhances any decoration with personalized ambiance.
Types of Miniature LED Lights for Decoration
Miniature LED lights come in various types that suit different decoration needs. Adhesive-backed LED strip lights are popular for their flexibility and easy mounting on walls, furniture, or even curved surfaces. These strips often use compact surface-mount device (SMD) LEDs, which are small and efficient, making them ideal for detailed lighting projects. For brighter displays, high-density LED strips pack more LEDs per foot, delivering stronger illumination without taking up extra space. If outdoor or moisture-prone areas are part of your design, waterproof LED strips are a practical choice to ensure durability. Individual LED bulbs come as single-color units or RGB (red, green, blue) types, offering a broad palette for custom color mixing. RGBW strips add a white LED for richer whites and more color accuracy. LED neon lights are another option, shaped into custom designs and encased in silicone tubing to create a smooth, continuous glow that mimics traditional neon signs but with better energy efficiency and safety. For precision lighting in crafts or models, miniature LED modules can be embedded to highlight exact points without overwhelming the piece. Battery-powered miniature LEDs add portability for small or temporary setups where plugging in isn’t convenient. Specialty LEDs like UV, amber, or warm white provide unique color tones that help set specific moods or enhance particular decoration styles. Choosing the right type depends on your project’s scale, location, and the kind of lighting effect you want to achieve.
Materials and Tools Needed for Custom LED Projects
When customizing miniature LED lights for decorations, having the right materials and tools makes all the difference. Start with LED strips or individual LED bulbs based on your desired look, flexible adhesive-backed strips work well for smooth surfaces, while individual LEDs allow more precise placement. Matching your power supply to the voltage and current needs of your LEDs is crucial to avoid damage or dimming. For joining LED segments, connectors are handy, but a soldering iron and solder provide a more secure and permanent connection. Controllers, often with remote or app controls, let you adjust colors and lighting patterns easily; for advanced projects, programmable controllers open up even more possibilities. Choose your mounting surface carefully, acrylic boards, walls, or plastic models are popular options, and use the adhesive backing on strips or mounting clips to keep everything stable. Basic wiring tools like wire strippers and a multimeter help ensure proper connections, while heat shrink tubing or electrical tape insulates and protects wiring from shorts. Don’t forget safety gear like gloves and safety glasses when handling electrical components. Having all these materials and tools at hand sets you up for a smooth and successful custom LED project.
- LED strips or individual LED bulbs depending on the desired effect
- Power supply matching the voltage and current requirements of the LEDs
- Connectors or soldering tools to join LED segments securely
- Controllers with remote or app capability to adjust colors and patterns
- Mounting surfaces such as acrylic boards, walls, or plastic models
- Adhesive backing on LED strips or mounting clips for stable installation
- Basic wiring tools including wire strippers, multimeter, and soldering iron
- Heat shrink tubing or electrical tape to safely insulate connections
- Optional programmable controllers for creating advanced lighting sequences
- Protective gloves and safety glasses for handling electrical components
Step-by-Step Guide to Creating Custom LED Decorations
Start by measuring the area where you want to place your LED decoration to determine the exact length of LED strip needed. Always cut the LED strips only at the marked cut points to avoid damaging the circuitry. Once cut, peel off the adhesive backing carefully and stick the strips onto a clean, dry surface for the best hold. To join multiple strips, use connectors or solder wires, ensuring solid electrical connections for uninterrupted lighting. Connect the power supply and LED controller according to the manufacturer’s instructions, making sure voltage and polarity match to avoid damage. Before finalizing your setup, test the lights to confirm all LEDs light up and the controller responds to commands properly. Use the controller or accompanying app to program your desired colors, brightness levels, and lighting patterns; this allows you to customize the ambiance perfectly. Secure all wiring neatly with clips or channels to prevent loose connections and accidental damage. Conceal wires where possible to maintain a professional, tidy look. Finally, mount or frame your decoration as planned, ensuring it is stable and visually appealing from all angles.
How to Adjust and Customize LED Colors?
To adjust and customize the colors of your miniature LED lights, start by using the remote control or mobile app provided with your LED system. Most systems rely on the RGB color model, which lets you mix red, green, and blue light intensities to create a wide range of colors. You can select from preset colors like red, blue, or green, or use the controller interface to craft custom shades. For example, creating a hot pink involves raising the red and blue levels while keeping green low. Brightness control is also key; dim the lights for a subtle glow or brighten them for vivid accents that stand out. If your LEDs support it, experiment with color temperature settings to switch between warm and cool whites, enhancing the mood further. Many controllers allow you to save your favorite color setups for easy reuse. To add more dynamic effects, explore modes such as fades, flashes, or continuous color cycles. Some advanced controllers even let you group different LED zones to display various colors in one project or program custom color sequences and patterns manually, adding a unique flair to your decorations.
Using Color-Changing LED Strip Lights Effectively
Choosing RGB or RGBW LED strips is key to getting a wide range of vibrant colors and cleaner whites in your decorations. RGBW strips add a dedicated white LED, improving color quality and brightness when you need neutral tones. Always make sure your power supply and controller match the voltage and current requirements of your LED strips to avoid damage or dimming. For mounting, pick clean, dry, and smooth surfaces to ensure the adhesive backing sticks well and the strips stay in place over time. Programmable controllers let you create custom color transitions and effects, making your decoration more dynamic and personalized. Some advanced setups even sync with music through compatible apps, turning your lights into interactive displays that react to beats or melodies. When installing, avoid sharp bends in the strip to protect the circuits inside; gentle curves are fine, but tight folds can cause failure. To cover larger areas or tricky shapes, use extension cables or connectors to maintain power and continuity. Layering multiple strips or placing them behind diffusers helps soften and blend the light, giving a more polished, even glow instead of harsh spots. Before finalizing your setup, test the lighting effects in the actual environment to see how colors and brightness look under real conditions. Also, plan your power layout carefully to prevent voltage drops along long LED runs, which can cause uneven brightness. For example, placing power feeds at multiple points or using thicker wiring can keep your display consistent and vibrant throughout.
Popular Apps and Controllers for LED Customization
When customizing miniature LED lights, the choice of app or controller can greatly affect your experience and the effects you achieve. Popular apps like Philips Hue offer easy control over smart LED strips with preset scenes and timers, making it simple to set moods without deep technical knowledge. The Govee app is known for its user-friendly interface and music sync feature that lets your LEDs pulse and change colors in time with your favorite songs. LIFX’s app supports brightness adjustment, a variety of color presets, and works well with voice assistants like Alexa and Google Assistant, providing hands-free control. For those wanting more control, DIY controllers based on Arduino or ESP boards allow custom programming to create unique light shows or patterns that go beyond preset options. Bluetooth controllers offer direct smartphone connection without needing a separate hub, which is convenient for smaller setups. Wi-Fi controllers add the benefit of remote access and smart home integration, so you can manage your lights from anywhere and group multiple LED strips for coordinated effects. Many apps also include scheduling options, enabling automated routines like turning lights on at sunset or changing colors throughout the day. Controllers range from simple handheld remotes to advanced app-based systems, so you can pick one that fits your comfort level and project complexity. Integrating voice assistants further expands possibilities, letting you adjust colors or turn lights on and off with simple voice commands. Overall, the right combination of apps and controllers can bring your decorative LED project to life with ease and flexibility.
Options for Professional Custom LED Neon Signs
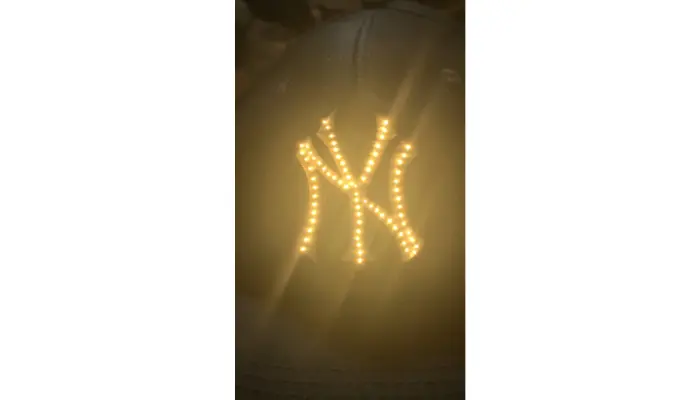
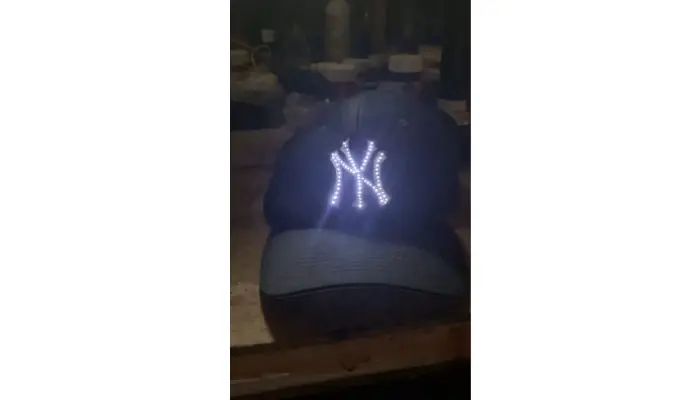
When looking for a polished, hassle-free way to create custom LED decorations, professional LED neon signs offer a great solution. Many companies let you order signs shaped exactly how you want, either by uploading your own design or selecting from ready-made templates. These signs use flexible silicone tubing that houses bright LEDs, giving a smooth, even glow that mimics traditional neon but with advantages like being lightweight and more energy efficient. They’re perfect for businesses wanting eye-catching branding, special events, or adding a personal touch to home décor. Professional fabrication ensures sturdy connections and weather resistance, so your sign lasts longer with less maintenance compared to glass neon. Plus, many providers offer installation services that make mounting simple, and you can choose from a variety of sizes, colors, and mounting styles. Some even come with remote controls or app integration, allowing you to adjust lighting effects easily. For anyone wanting a durable, vibrant, and customizable LED display without DIY complexity, professional LED neon signs provide a reliable and stylish option.
Safety Tips for Working with Miniature LED Lights
When customizing miniature LED lights, safety should be a top priority to avoid damage and hazards. Always use power supplies that match the LED voltage and current requirements; using the wrong power source can lead to overheating or failure. Avoid overloading circuits by connecting too many LEDs in series or parallel, as this can cause excessive current draw and potential shorts. Secure all wiring connections properly, using solder or reliable connectors, and insulate exposed wires with heat shrink tubing to prevent accidental contact and shorts. Only cut LED strips at the marked points to keep the circuitry intact and maintain functionality. Keep wiring and power supplies away from moisture unless they are rated waterproof, especially for outdoor setups. When soldering or handling electrical parts, wear protective gloves and glasses to guard against burns or eye injury. Before final installation, test your LED system at low power to catch any faults early. For outdoor decorations, ensure your components have appropriate weatherproof ratings and seal all connections to protect against the elements. Following the manufacturer’s guidelines for cutting, connecting, and mounting will help maintain safety and extend the life of your custom LED project.
Maintaining and Caring for Your LED Decorations
To keep your miniature LED decorations bright and functional, regular maintenance is important. Clean LEDs gently with a soft cloth to remove dust without scratching the surface. Avoid harsh chemicals that can damage the LED casing or weaken adhesives holding strips in place. Periodically inspect wiring and connectors for any signs of wear, looseness, or corrosion, as these can cause flickering or complete failure. Keep power supplies and controllers in well-ventilated areas to prevent overheating, which can shorten their lifespan. For outdoor LED decorations, ensure all connections and strips are sealed properly to protect against water damage. When not in use, store removable LED decorations in a dry place to avoid moisture buildup. If you notice any damaged LED strips or connectors, replace them promptly to avoid issues in the entire system. Using surge protectors can safeguard your setup from electrical spikes that might otherwise cause damage. Also, if your LED system uses an app or controller with firmware updates, keep it updated to improve performance and add new features. Lastly, schedule regular testing of your lighting patterns and colors to ensure everything works as expected and to catch any problems early.
Creative Ideas for Decorating with Miniature LEDs
Miniature LED lights open up a wide range of creative decorating possibilities. You can add tiny LEDs inside miniature models or dioramas to create subtle ambient lighting that brings scenes to life. Using color-changing LED strips inside small display cases adds dynamic effects that draw attention and create mood shifts. To soften the often harsh light LEDs produce, try combining them with diffusers or frosted acrylic panels, which spread the glow evenly and reduce glare. For a more interactive touch, sync your LEDs with music or events, turning your decorations into immersive experiences that respond to sound or activity. Layered lighting can be achieved by mixing LEDs of different color temperatures and brightness levels, adding depth and interest to your setup. You can also outline shapes or letters with LED strips to craft custom signs or personalized messages that stand out. Seasonal decorating gets a unique upgrade by integrating LEDs into holiday ornaments and displays, offering effects that traditional lights can’t match. For portable or wearable art projects, battery-powered miniature LEDs provide flexibility without the need for cords. Programmable LEDs let you build light-up artwork or wall hangings with sequences that change color or pattern, making your decorations truly one of a kind. Finally, placing LEDs behind objects to play with shadow and light contrasts adds a dramatic and artistic flair to your designs.
Summary of Customizing Miniature LED Lights
Customizing miniature LED lights begins with choosing the right type of LEDs that fit both your design vision and the surface you plan to decorate. Whether it’s flexible adhesive-backed strips or individual bulbs, selecting appropriate LEDs is key for ease of installation and desired effect. Cutting and mounting must be done carefully, following manufacturer guidelines to ensure safe connections and lasting adhesion. Controllers and apps add a layer of versatility, allowing you to change colors, brightness, and lighting patterns effortlessly. For those looking to go beyond basic setups, programmable controllers and music synchronization can create dynamic, interactive displays. On the other hand, professional custom LED neon signs offer a hassle-free way to get complex, durable designs without the DIY challenges. Planning your layout ahead of time helps prevent electrical problems and keeps maintenance manageable. Using proper tools and materials ensures clean installations with neat wiring and solid connections. Safety is crucial, matching power supplies to LED requirements and securing wiring helps avoid shorts or damage. Creative uses range from subtle ambient lighting to themed decorations that respond to music or events. Regular upkeep, like gentle cleaning and inspection, maintains brightness and functionality over time.